The holiday season brings a unique sparkle, and few traditions capture this magic quite like building a gingerbread house. Imagine crafting a whimsical, edible masterpiece that not only serves as a stunning centerpiece but also fills your home with the inviting aroma of spices and sweet treats. For many, the idea of creating a gingerbread house from scratch can seem a bit daunting, yet it’s a truly rewarding family activity that kids and adults alike will adore. This comprehensive guide serves as the ultimate guide to the best Christmas gingerbread house, demystifying the process from a perfectly sturdy dough to flawless royal icing and rock-solid assembly.
Forget flimsy walls and crumbly foundations; we're here to ensure your holiday creation stands tall and proud, an edible testament to your festive spirit. We'll walk you through designing, baking, constructing, and decorating, sharing expert tips and insights that go beyond the basics. Get ready to embark on a delightful journey to create your most spectacular homemade gingerbread house yet!
Crafting the Perfect Gingerbread Dough for a Sturdy Foundation
The secret to a structurally sound gingerbread house begins with an impeccable dough recipe. Unlike regular gingerbread cookies designed to be soft and chewy, gingerbread house dough needs to be firm, stable, and bake flat without excessive puffing. This particular Christmas cookie house recipe utilizes pantry-friendly ingredients, carefully balanced to provide both delicious flavor and robust integrity.
- All-Purpose Flour: The primary building block, providing the necessary structure.
- Unsalted Butter: Using unsalted butter gives you complete control over the salt content in your recipe. It contributes to a rich flavor and tender crumb, but for a sturdy house, moderation is key to prevent excessive spreading.
- Brown Sugar: This isn't just for sweetness; brown sugar is crucial for that signature molasses flavor and a beautiful, darker hue. Its slight moisture content also helps keep the dough pliable without being sticky.
- Golden Syrup (or Molasses Blend): Golden syrup adds a unique depth of flavor and helps achieve that classic gingerbread chewiness while keeping the dough manageable. For an even more intense, traditional molasses flavor, you can replace a small portion of the golden syrup with true molasses, or use a blend of corn syrup and molasses. This ingredient is vital for both flavor and binding.
- Room Temperature Eggs: Eggs act as a binder, helping to hold the dough together. Using them at room temperature ensures they incorporate smoothly into the mixture, creating a more uniform dough.
- Baking Powder: A minimal amount of baking powder is used. The goal is to avoid significant rising, which can distort the shape of your house pieces and lead to cracks. We want flat, even surfaces for easy assembly.
- Spices: A simple yet aromatic combination of ground cinnamon, ground ginger, and a pinch of salt forms the backbone of our flavor profile. For those who love a more complex spice blend, consider a pre-mixed "gingerbread spice" that often includes cloves, allspice, and nutmeg, elevating the aroma and taste profile.
Pro Tip for Dough Perfection: After mixing, always chill your dough. This makes it much easier to roll out evenly and prevents it from spreading too much in the oven, ensuring your house pieces maintain their precise shapes. When baking, roll the dough to a consistent thickness and poke a few holes in each piece with a fork to prevent large bubbles, yielding a perfectly flat surface essential for stable construction.
Before you even think about mixing dough, you'll need a template. Whether you design your own or use free patterns available online, precise templates are non-negotiable for a house that fits together perfectly. Lay your template pieces over the rolled dough before cutting to ensure accuracy. For more on this crucial first step, explore our The Ultimate Guide to Building Your Perfect Christmas Gingerbread House.
Royal Icing: The Indispensable "Glue" and Decorative Masterpiece
When it comes to gingerbread house construction and decoration, royal icing is the undisputed champion. Unlike softer alternatives like buttercream or regular sugar icing, royal icing hardens to a rock-solid, stable finish as it dries. This makes it the ideal "cement" for assembling your house and creating intricate, long-lasting decorations.
Here’s what you’ll need for this crucial component:
- Egg Whites: These are the foundation of royal icing. If your gingerbread house is intended for consumption, using pasteurized egg whites is highly recommended for food safety. This eliminates the risk associated with raw eggs.
- Icing Sugar (Confectioners' Sugar/Powdered Sugar): This finely milled sugar dissolves perfectly into the egg whites, creating a smooth, pipeable, and ultimately hard-setting icing.
- Lemon Juice or Lime Juice: A small amount of citrus juice not only adds a touch of brightness to the flavor but also acts as a stabilizer, helping the egg whites whip up properly and preventing sugar crystallization for a smooth, glossy finish.
- Cream of Tartar (Optional): Like lemon juice, a tiny pinch of cream of tartar can further stabilize the whipped egg whites, ensuring your icing holds its peaks beautifully and maintains its structure.
Mastering Royal Icing Consistency: For assembling the house and securing heavier decorations, you'll want a very thick, stiff consistency – think toothpaste or peanut butter. For fine detailing, drawing patterns, or "flooding" larger areas, you'll need to thin it down slightly with a few drops of water, aiming for a consistency that flows smoothly but still holds its shape. It’s always better to start thick and thin it gradually.
Don’t be shy with your icing! It’s often best to prepare 1.5 to 2 times the amount you think you'll need, especially if you plan on extensive decoration or using it to "glue" on a lot of candies and embellishments. Royal icing can also be colored with natural food colorings to add vibrant detailing, or flavored with extracts like orange or peppermint for an extra festive touch. Store prepared royal icing tightly covered with plastic wrap directly touching the surface to prevent it from drying out.
Assembling Your Edible Dream Home: Step-by-Step Construction
With your perfectly baked gingerbread pieces and ready-to-go royal icing, it’s time for the most exciting part: bringing your gingerbread house to life! Patience and preparation are your best friends here. For a detailed, step-by-step guide on the process, consider our Homemade Gingerbread House: Easy Steps for a Fun Family Tradition.
- Prep Your Workspace: Ensure you have a flat, stable surface for construction. Have your piping bags filled with stiff royal icing (cut a small tip) and any necessary props (cans, heavy blocks, or even thick books) ready to support walls as they dry.
- Start with the Walls: Begin by piping a thick line of royal icing along the bottom edge of one of your side walls and firmly attach it to your chosen base (a sturdy cardboard covered in foil or parchment works well). Immediately pipe another line along the vertical edge where it will meet the first front or back wall. Attach the adjacent wall, pressing gently but firmly.
- Support and Dry: This is critical! Use your props to support the walls, holding them in place until the icing is stable enough to stand on its own. This usually takes 15-30 minutes, but for absolute security, allowing each section to dry for an hour (or even longer if you're not in a hurry) is highly recommended. Resist the urge to rush!
- Complete the Walls: Continue around, attaching the remaining walls one by one, allowing each joint to set before moving on. Make sure your corners are square for maximum stability.
- Attach the Roof: Once all four walls are completely dry and sturdy, it’s time for the roof. Pipe generous lines of royal icing along the top edges of the walls and the peak where the two roof panels will meet. Carefully place one roof panel, holding it in place until it starts to adhere. Repeat with the second panel. Again, props are invaluable here to hold the roof in position as the icing dries, which might take a few hours or even overnight.
- Finishing Touches Before Decorating: Once the entire structure is dry, you can go back and pipe additional icing along all seams, both inside and out, to reinforce them and hide any gaps. This not only adds strength but also creates a lovely "snow drift" effect.
Common Pitfall Avoidance: The biggest mistake beginners make is rushing the drying process. A gingerbread house is a labor of love that rewards patience. If your walls are sliding or your roof is collapsing, it's almost always due to insufficient drying time between steps. Don't be afraid to use plenty of icing and give it ample time to set.
Essential Tools and Creative Decoration Ideas
While the dough and icing are the heart of your gingerbread house, the right tools make the process much smoother and more enjoyable. You'll need:
- Ruler, Paper, Pen/Pencils, Scissors: Indispensable for creating or cutting out precise templates. Accuracy here translates directly to a house that fits together seamlessly.
- Piping Bags: These are essential for applying royal icing with precision, whether for construction or detailed decoration. Alternatively, a squeeze bottle or even a Ziploc bag with a tiny corner snipped off can work in a pinch.
- Baking Sheets & Sharp Knife: For baking your gingerbread pieces and ensuring clean cuts.
- Plastic Wrap: To keep your royal icing from drying out between uses.
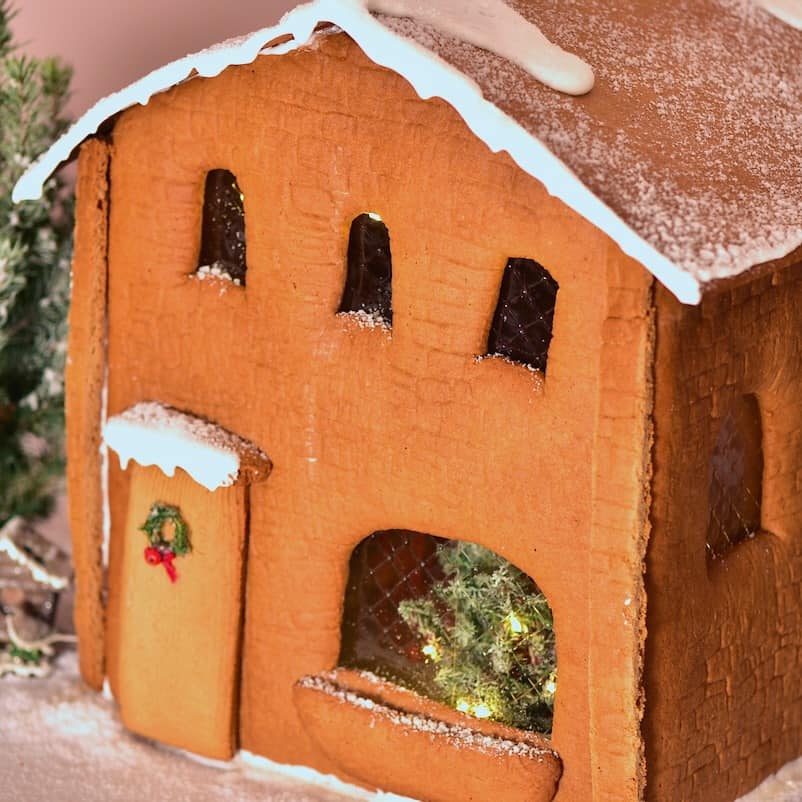
- Optional Creative Tools: Silicone molds can add unique textures to your house pieces (think brickwork or roof tiles). Gelatin sheets can be cut to size and "glued" into window openings with icing, creating beautiful stained-glass effects that truly make your house glow from within (especially if you add a small LED tea light!).
Once your house is fully assembled and dry, the fun of decorating truly begins! Let your imagination soar with a wide array of candies, sprinkles, crushed peppermints, gumdrops, pretzel sticks, and more. Use varying consistencies of royal icing to create snowy landscapes, icicles, and intricate designs. The sky's the limit when it comes to personalizing your edible holiday home!
Conclusion
Building a gingerbread house from scratch is more than just baking; it's an immersive experience that weaves together culinary skill, artistic expression, and cherished family time. While it may seem like a monumental task at first glance, armed with the right recipe for sturdy dough, stable royal icing, and thoughtful assembly techniques, you're well on your way to creating a truly magical Christmas centerpiece. This comprehensive guide has provided the ultimate guide to the best Christmas gingerbread house, ensuring your creation is not only delicious but also stands tall and proud throughout the festive season. Embrace the process, enjoy the aromas, and relish the joy of crafting a beautiful, edible dream home that will undoubtedly become a treasured holiday tradition for years to come.
